Thayer Street Map


The concept for my Thayer Street map was based on a stop light. I wanted my map to be modern, easy to read, and informative. Four tools I used to create my map were the Pen tool, fill patterns, Illustrator effects (outer glow), Pencil Tool, and pathfinder. I used most of the effects to make my custom symbols (Foood symbol, bus symbol, and stop light.) One challenge I faced while making my map was gathering information. I wrote down most of the clothing stores I went to but when I started making my map I decided to switch to food. I had to look up all of the information online and found it confusing because a lot of the places shown online were no longer in business and new ones were added. I think the most successful thing about my map is the symbols I created. I used basic shapes, the pen and fill tool to create objects such as the stoplight in my seal. If I could change anything about my map it would be to pick a different concept. I like how easy to read my map is, but it was hard to be creative and still make it look interesting.
Syrup Bottle Label


Waffle Day
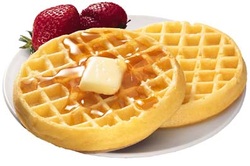
To make waffles, the ingredients you need are:
- One box of Bisquick Original Pancake and Baking Mix
- Milk
- Vegetable Oil
- 1 egg
- Butter
- Syrup
-Add Ins and Toppings (Chocolate chips, strawberries, powdered sugar, ect)
To make the waffles, you must first stir together 2 cups of Bisquick Mix, 1 1/3 cups of milk, 2 Tbsp Vegetable Oil, and 1 egg first mixing the wet ingredients and then adding the dry. While you are mixing these ingredients, plug in your waffle iron, allowing it time to heat up. When the waffle iron is heated, spray the plates of it with pam and pour the mix into the center of the waffle maker. Close the lid and allow about 5 minutes for the waffle to cook. Remove the waffle, being careful not to burn yourself. Butter, add toppings, and enjoy!
Polar Express Ticket
For our next assignment in graphics we had to make a ticket for a Polar Express event at an elementary school. For the basic
shape of the ticket I created the cut outs from the rectangle by using the elipse tool to make circles filled with white to make the actual ticket the right shape. I then used a picture from the Polar Express book, lowered the opacity, and made it the background for the ticket. I then used the rectangle tool to make a gold stripe appearing throughout the middle of the ticket.
I used the inner glow tool to give the stip a more realistic gold color. Next, I took a picture of the train from the Polar Express movie and cut it out using the eliptical marquee tool and placed that in the center of the ticket. Then, I put the image into adobe illustrator to use the type on a path tool, to make the text bend around the picture of the train. During this project I learned how to download brushes from brusheezy.com and texts from dafont.com. I also learned how to move the o in No 01117 up to look like a more realistic ticket number using the character panel. I really like the outcome of this ticket and was happy to find out that it won the contest and will be used as the front side of the ticket, while Morgan Steele's will be used as the back side!
Pop Art
For our next project in graphics we had to make a self portrait inspired by the art of Roy Lichtenstein . We began by taking a picture of ourselves and uploading it to photoshop where we resized it. We then put it into Adobe Illustrator and began to outline ourselves with the pen tool, making the stroke thick and changing the brush style to a more artistic, hand painted look. This was the most time consuming part of the project. Once that was completed, we just filled in the shapes with colors and the Ben-Day dots pattern that we made. I chose to make my ben day dots very small so that it almost looked like a solid color. We added small details to make the eyebrows, nose, hair texture, ect. Finally, we made the caption bubble by making cirles with the shape tool, overlapping them, and then merging them with the path finder tool. I chose the caption "Just friends?" and used a font I downloaded from dafont.com. I am happy with the outcome, though I preferred my original that was ruined in the transfer from my home computer to school.
10 Careers Related to Graphic Design
1. Advertising
2. Web Designer
3. Animation
4. Industrial Designer
5. Multimedia Developer
6. Illustrator
7. Art Director
8. Photographer and photo editor
9. Graphic Design Teacher
10. Logo Designer
2. Web Designer
3. Animation
4. Industrial Designer
5. Multimedia Developer
6. Illustrator
7. Art Director
8. Photographer and photo editor
9. Graphic Design Teacher
10. Logo Designer
