CD Cover 2
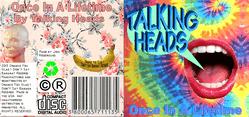
Our sixth project in Graphics was to reasearch and make a CD cover based off of a school appropriate song that Mr.Adams picked. The song i recieved was Once In A Lifetime by Talking Heads. I then took pictures and backgrounds from the internet and made a design for the front cover and inside pannels. I took a picture of a person talking and cut out its mouth so that it was just a mouth and put a word bubble coming out of it with the name of the band. I then added a tie dye background and decorated the back and inside. I added a few heads, my record label from last time, the compact disc sybol, the recyclable symbol, the copyright symbol, and anything else I needed to complete the CD cover. I tried to really capture the spirit of the band in this project. When i looked up a picture of them it came up with them in funky 80's outfits with many different, clashing, patterns. So i took different different patterns and placed them as the background to the different sections of the CD cover. I was happy with the outcome and would not change anything about this project.
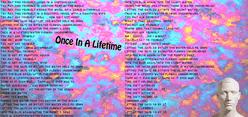
Inside CD pamphlet
Waffle Making Instructions
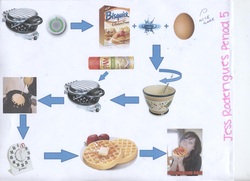
Our seventh project in graphics was to make directions on how to make a waffle to go along with the annual waffle day. The goal of the project was to make instructions on how to make a waffle, but without usuing any words, only arrows and pictures. I Gathered images that could depict the step of the proccess I needed to show. Then after I placed them on, I used blue arrows to indicate what order the steps go. The first step is to turn on the waffle iron to make it heat up, the second is to get the waffle mix you like and put it in a bowl along with the other ingredients needed (in this case water and an egg.) Next, you mix them together in the bowl to make a batter. Then you would spray the waffle iron with pam so that it does not stick! After that, you pour the waffle batter into the waffle iron. Next you wait around 3 minutes, or until the waffles turn golden brown. Then, you take the waffles out and put them on a plate, but be careful not to burn yourself! The final step is to eat your warm, delicious waffles and enjoy!
Calendar Sheet 7
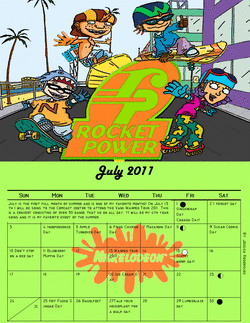
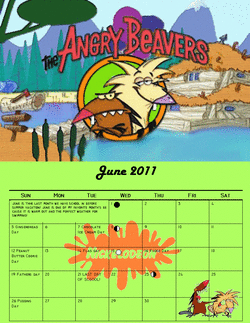
Our eighth project in graphics is to make a 2011 calendar. The theme that I chose for my calendar is 90's nickelodeon cartoons. I was born in the 90's and I believe that the 90's have the best cartoons of all time. I used a blank calendar template on Microsoft Publisher and made the background color green and added the nickelodeon logo infront of it. Nickelodeon's colors are bright green and orange so I tried to work those colors into every one of my pages. Next, i looked up different holidays in July and added the ones that I celebrate and enjoy to my calendar. I then looked up the moon schedule and put when half and full moons are. I love the space and the sky so I made sure to include the moon. I next wrote a small paragraph about July and added that in to top corner to fill up blank space. After that, I found a picture of Rocket Power (a popular cartoon in the 90's) and edited it with photoshop. I changed the colors of the logo to green and orange to add unity and I recolored a lot of the characters and objects in the background. I also got rid of the nickelodeon logo that was in front of the Rocket Power logo because I did not like it. Last, I added the "poster edges" filter in Photoshop to it. I like the outcome of it, the only thing I would change would be that I would have edited the image in a more recognizable way. It took a lot of work and I want people to be able to tell.